Starting the project at last!

The place to talk Slicks. All we ask is that discussion has something to do with slicks...

Moderators: Casey 65, Kid

andgott
Posts: 167
Joined: May 26, 2011, 10:11 pm
Location: Athens, TN
Contact:

Starting the project at last!

Post by andgott »

I started working on my cab today, which is going to be the first step in my restoration. I didn't want to get going on it until I had my new MIG welder... Now that it's here, I don't have any excuses :)

The plan is to get the cab done, then remove the rest of the body, fix the front clip up a bit (new fender, sand & prime the rest), then repair the bed. This is FAR more extensive than I had originally planned, but once I found out that I was going to have to replace the cab, I decided that since I was taking most of the truck off the frame, I might as well just take it all off and do it right.

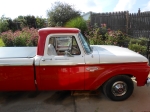
I've restored a LOT of boats- But never a truck... So I'll be asking a LOT of questions as I go. And, if you see me doing something incredibly stupid, Smack me in the face. I'm learning as I go!

I figure the easiest way to go about it will be to strip and fix any issues on the bottom, including the floors, first- then flip it back up and do the rest. So, first I flipped it so I could work-

Image

There was a lot of black 'gunk' on the bottom- At this point, I had already let some stripper sit on it for a few hours, then I knocked off most of it off. I'm not sure what it is, it seems like tar of some kind, it's semi-soft, and is a real treat to get off... But, it is probably what kept the metal protected and relatively rust free.

Once it was off, I could see the extent of damage to the floor. This is the drivers side- There are a few holes, but not too bad. The passenger side is MUCH better. I can see I'll be welding a few patches in, but it's far better than what I had before-

Image

And, after a bit more work-

Image

It amazes me what can hind behind paint! Some areas that looked fairly solid were, in fact, not-

Image

Up on the cowl, there was a spot that had a TON of bondo... The thickest was almost 2"! I'm going to cut it out and replace the sheet metal, it's pretty nasty.

Image

The cab mounts are, in general, good. There was a bit of rust in the bottom of the drivers side mount. I'm not sure how I should handle it- Weld over it? Cut it out and patch?

Image

-Andrew
User avatar
slickmainer
Posts: 2555
Joined: October 8, 2007, 6:41 pm
Location: Auburn Maine
Contact:
United States of America

Re: Starting the project at last!

Post by slickmainer »

the rest of the mounts look good, if it were me i'd just patch that area or i think they sell slip on style mounts
--Gregg--
you can't get there from here
ICEMAN6166
Posts: 11470
Joined: July 11, 2006, 11:28 am
Location: Dove Creek, Co. elevation 6842
Poland

Re: Starting the project at last!

Post by ICEMAN6166 »

andgott wrote:-


Up on the cowl, there was a spot that had a TON of bondo... The thickest was almost 2"! I'm going to cut it out and replace the sheet metal, it's pretty nasty.

Image

The cab mounts are, in general, good. There was a bit of rust in the bottom of the drivers side mount. I'm not sure how I should handle it- Weld over it? Cut it out and patch?

Image

-Andrew
Andrew

i have the cowl piece you need:

viewtopic.php?f=6&t=24684

does have the 2 holes for the trim clip but those are easily closed with weld

as for the floor/cab mount i would order the new pieces from www.flashbackf100s.com
1966 F250 4x4
1964 Rambler Ambassador 990
Rest in peace departed Slick family members
Cam Milam
Lesley Ferguson
Steve Lopes
John Sutton
User avatar
Mugwump
Posts: 25
Joined: June 20, 2011, 12:38 pm
Location: San Jose, CA

Re: Starting the project at last!

Post by Mugwump »

Looks like you're making solid progress. I'm really hoping that I don't have to take mine down that far, but I do have the Pope's holy floorboard on the driver's side. I think I'll try to patch it without removing the whole cab :P How are your drip rails?

Oh, and what welder did you end up with? I'm in the market for a new setup as well - my little Lincoln 100 may be overmatched...

I'll be watching your progress - good luck!
-Dennis

Ned > '63 F100 Shorty EFI 5.0/T-5
Alice > '65 F100 Custom Cab Shorty 390/CoM/9" (sold)
Shep > '66 F100 Custom Cab 352/4sp/9" (gave to my friend OldDawg)
Tug > '69 F250 Ranger CS 390/C6 (sold)
Gus > '72 F250 Sport Custom 390/C6 (sold)
andgott
Posts: 167
Joined: May 26, 2011, 10:11 pm
Location: Athens, TN
Contact:

Re: Starting the project at last!

Post by andgott »

Mugwump wrote:Looks like you're making solid progress. I'm really hoping that I don't have to take mine down that far, but I do have the Pope's holy floorboard on the driver's side. I think I'll try to patch it without removing the whole cab :P
I didn't PLAN to go this far, but the floors and cab mounts were pretty well rotted out in the original cab- And I found it would be cheaper and easier to replace it rather than buy the sheet metal and replace them. It is pretty nasty-

Image

It'll also save me countless hours of welding.
Mugwump wrote: How are your drip rails?
Nice and solid, only one little area with a bit of rust, which should be easy to fix.
Mugwump wrote:Oh, and what welder did you end up with? I'm in the market for a new setup as well - my little Lincoln 100 may be overmatched...
I did a lot of research, and ended up getting the Eastwood 135. I just got my shielding gas today-

Image

At $299, The price was right, and people seem to be happy with them. I had an 85 amp wire feed flux core before, and this is SO much better! I was impressed with it when I was using the flux core, but playing around today with the solid wire and the shielding gas, I like it even better! I did some playing around with an old, beat up fender from a '68 Ford that a neighbor gave me to play with-

Image

And, After a bit of grinding-

Image

It turned out pretty decent. Be nice, now- It's the first time I've done it!

As for the cowl, I think I'm going to TRY to fix it- Just to see if I can. If I can't, I'll buy one.

I think I'm going to patch the floor, and the mount. I don't think either are bad enough to warrant removal and total replacement. I can use the practice, and besides, I'm cheap...

-Andrew
andgott
Posts: 167
Joined: May 26, 2011, 10:11 pm
Location: Athens, TN
Contact:

Re: Starting the project at last!

Post by andgott »

After a few more practice welds, I got brave and decided to try to tackle some of the real work... I welded up the hole in the transmission tunnel-

Image

Then I moved on- I think this is called a drain panel, It's on the front of the door pillar on the cowl-

Image

As you can see, it didn't drain too well, and there was a lot of rust down at the bottom. I repaired it in sections, cutting away the bad stuff, leaving anything that was still good.

Image

There was a little damage in the front of the door pilar- Which I also cut away... The welded on nut was also missing, which has been remedied!

I made a replacement piece-
Image

And welded it in-
Image

Then, I patched the rest of it up-
Image

And ground it all down-
Image

It doesn't look perfect, but it works! I'm happy with it...

I'm going to put some larger drain holes in it, so hopefully the thing will actually drain! I had a few small fires when I was cutting the old stuff out, there were a lot of leaves and pine needles hiding in there.

-Andrew
User avatar
Gary Seymour
Posts: 1192
Joined: September 15, 2006, 5:17 am
Location: Brown County, Indiana
United States of America

Re: Starting the project at last!

Post by Gary Seymour »

Looks like some nice work to me! Very good repairs. :D

I may have to look into one of those Eastwood welders..... 8)
User avatar
Mugwump
Posts: 25
Joined: June 20, 2011, 12:38 pm
Location: San Jose, CA

Re: Starting the project at last!

Post by Mugwump »

Looks great Andrew! I'm pretty much a novice welder myself, so I hope my attempts come out as well. I'm looking at the Millermatic 140 welder, but that Eastwood unit is about 1/3 the price... I'll have to check it out. I figure any of the gas shielded welders will provide better results than the Lincoln flux core unit I have now.

Gotta get me some practice panels like you did...

Keep up the great work!
-Dennis

Ned > '63 F100 Shorty EFI 5.0/T-5
Alice > '65 F100 Custom Cab Shorty 390/CoM/9" (sold)
Shep > '66 F100 Custom Cab 352/4sp/9" (gave to my friend OldDawg)
Tug > '69 F250 Ranger CS 390/C6 (sold)
Gus > '72 F250 Sport Custom 390/C6 (sold)
oldtrucks
Posts: 1015
Joined: November 28, 2007, 1:59 am
Location: Pinehurst Idaho
United States of America

Re: Starting the project at last!

Post by oldtrucks »

Mugwump
Go to your local welding supply and get the gas kit for your welder. I did that for my 110 welder and it costs way less than a new welder, it is really easy to install and you will really like welding with the gas shield.
Mike Kincheloe
Mikes Old Trucks
I restore old trucks and cars


1962 UNI Short Box, Stock Y block, 4 speed Image
1972 F 250 4X4 429 4 speed Dana 70 rear
1977 F 350 Camper Special, Ranger, Super Cab
1950 F7 Cab and Chassis
1976 F150 4 Speed 4 X 4
1996 Taurus
User avatar
Mugwump
Posts: 25
Joined: June 20, 2011, 12:38 pm
Location: San Jose, CA

Re: Starting the project at last!

Post by Mugwump »

Yeah, thanks Mike - that's probably the best place to start... I wasn't sure that this welder had that option, but it looks like it might.
-Dennis

Ned > '63 F100 Shorty EFI 5.0/T-5
Alice > '65 F100 Custom Cab Shorty 390/CoM/9" (sold)
Shep > '66 F100 Custom Cab 352/4sp/9" (gave to my friend OldDawg)
Tug > '69 F250 Ranger CS 390/C6 (sold)
Gus > '72 F250 Sport Custom 390/C6 (sold)
User avatar
loosrp
Posts: 220
Joined: June 22, 2009, 7:30 am
Location: Dayton Ohio

Re: Starting the project at last!

Post by loosrp »

Very nice work
andgott
Posts: 167
Joined: May 26, 2011, 10:11 pm
Location: Athens, TN
Contact:

Re: Starting the project at last!

Post by andgott »

I got brave today and decide to tackle the cowl... Unlike the other repairs I've been doing, this will actually be seen- so I had to be a bit more careful! Don't laugh too hard- It's my first time doing this :)

I cut away all the damaged and rusted areas-
Image

The first rough test fit of the new panel- I had already welded some steel in behind the repair area
Image

Cut to fit-
Image

And, After some grinding-
Image

Image

Not perfect, But it's pretty good... I'll need a little Bond-O to get it completely smooth, but nothing like the huge chunk that was on the old panel!

I started working on the floor, too. The passenger side is great, there is only one small hole. The drivers side isn't bad, but it has a few issues... Ironically, all the rust is on the INSIDE- And most of it was hidden under a thick layer of black tar-like 'gunk'. This is the worst damage-

Image

I decided that the best way to deal with it was to cut away the bad section of floor, and replace it... I drilled out the spot welds from the cab mounts, then cut away the floor, being careful not to cut in to the cab mounts.

Image

Image

I've got the new section partially fabricated, Hopefully I'll get it installed tomorrow.


-Andrew
User avatar
ken462
Posts: 113
Joined: October 12, 2011, 2:55 pm
Location: New Mexico

Re: Starting the project at last!

Post by ken462 »

Andrew,
Looking good. I started out with a bunch of rust in mine and just kept repairing and welding and before I knew it I had a whole, rust free cab. Have fun.

Ken
User avatar
HiBoy63
Posts: 1235
Joined: March 12, 2007, 1:48 pm
Location: Colbert Wa
Ireland

Re: Starting the project at last!

Post by HiBoy63 »

Nice panel fab work on that cowl. The cab is looking good it will far better than trying to fix the one you had. You are already money and time ahead.
1963 F250 4x4x292
1965 F100 4x4x352
1998 F150 4x4x4.6
2001 Sport Track 4x4x4.0

In case you are wondering thats Ireland......Freedom is not Free!!!!!!!!

Heritage country Flag
andgott
Posts: 167
Joined: May 26, 2011, 10:11 pm
Location: Athens, TN
Contact:

Re: Starting the project at last!

Post by andgott »

I spent the day working on the floors... I'd probably be done now, Except I ran out of MIG wire! I've gone through a pound of in the past two days...

In addition to the area below the firewall, there was one other area on the drivers side that needed removal-

Image

I made up a patch panel-

Image

Then I welded... I got the big patch in, as well as most of the smaller holes filled. The smaller patch is tacked in, but not finished, since I ran out of wire!

All that's left now is the cowl on the passenger side, which upon further inspection is a little worse than I thought, a bit of work on the drip rails to fill some small holes that were hidden under the seam sealer, and the cab corners... That SHOULD do it, unless I fine more. I'm thinking that I probably will :)

-Andrew
andgott
Posts: 167
Joined: May 26, 2011, 10:11 pm
Location: Athens, TN
Contact:

Re: Starting the project at last!

Post by andgott »

The floor is more or less done, I've got a bit more grinding to do on the welds. I'm not trying to get it perfect, since it's going to have a layer of POR on it, then a layer of soundproofing, then carpet- so hopefully it'll never be seen!

I tackled the cab mount today- There was some rust on the drivers side mount- It started out like this-

Image

I cut the first layer of steel away. It was rusty underneath, but not too bad.

Image

I cleaned it up with a wire wheel, then cut a new piece to fit. I had some heavier sheet around the shop- It's like 10 ga or so, a little heavier than what was there, but I figured a little extra strength wouldn't hurt-

Image

The test fit- Close. The holes even lined up! I rounded the top edge a bit on my anvil to make it conform to the curve of the original mount-

Image

Then, I tacked it, and welded it in-

Image

And ground it down-

Image

You'd be hard pressed to tell that a repair was ever made. I'm happy with it, anyways.

I went through a 1 lb spool of wire and 80 cu ft of Argon/CO2 gas this week! I bought another spool of wire, this time it's Lincoln brand, and it seems to work better than the generic wire that came with the welder, Smoother feeding and it seems to result it a better bead.

-Andrew
andgott
Posts: 167
Joined: May 26, 2011, 10:11 pm
Location: Athens, TN
Contact:

Re: Starting the project at last!

Post by andgott »

A bit of a break from the cab today, I decided to fix the 'new' drivers side fender I picked up this weekend... One of the bord members should be able to recognize this-

Image

Image

It's in pretty decent shape, a few small rust issues to patch, one of the worst was under the reflector, where water has been trapped by the gasket that was SUPPOSED to keep water out!

Image

I cut out the bad areas-

Image

Cut a patch for both of them, and welded it in.

There was a bit of rust on the top, too-

Image

I cut that out-

Image

Then made up a patch... This one was a little tougher, since it was curved. Good thing I'm a Blacksmith, My anvil was PERFECT for getting the curve right. After a lot of adjustments, I got a good fit-

Image

Then, Welded it in....

There were some dings, too- This crease was the worst of them-

Image

So, I got out the hammer and dolly and straightened it out a bit... I've done some sheet metal forming before, but not on a fender... I think I did a decent job. It might need a TOUCH of Bond-O to make it perfect-

Image

And, The finished product, ready to prime- I think it turned out pretty decent!

Image

I did the inside, too- I took a wire wheel to it to remove the rust. The areas I couldn't hit with the wheel got hit with the spot blaster. Then, I used a rust converter/sealer on it-

Image

I'm not sure if I'm going to coat the sealer- I've been told it's fine as long as it's not exposed to sunlight... If the inside of my fenders are getting exposed to sunlight, I think rust is the least of my problems :)

-Andrew
User avatar
mrgoob
Posts: 240
Joined: January 27, 2011, 9:01 pm
Location: Concord, NC

Re: Starting the project at last!

Post by mrgoob »

Thanks for all the pictures. Nice work-it's coming along well.
andgott
Posts: 167
Joined: May 26, 2011, 10:11 pm
Location: Athens, TN
Contact:

Re: Starting the project at last!

Post by andgott »

A bit more today... I worked on the cowl on the passenger side. It started out a little nasty-

Image

I cut away all the rusty stuff-

Image

Then rebuilt it all with new steel-

Image

I realized when I was doing the OTHER side that I didn't really have to make it the same as it was, since a lot of this is concealed behind the fender... So I simplified it a bit. You shouldn't be able to tell once it's all put back together :)

I also played with the tailgate a bit. The previous owner had filled a LOT of rust holes in it with bondo- Thick layers of it. Most of the metal underneath is in pretty good shape, so I cut away the damage, and made a patch panel. This was just a trial to see how close I could match the bend, it came out pretty well!

Image

There are two more spots like that, otherwise it's in good shape.

No more work this weekend- We've got an antique boat show in Florida to go to!

-Andrew
User avatar
totten
Posts: 284
Joined: January 1, 2012, 8:05 pm
Location: Erlanger,ky
United States of America

Re: Starting the project at last!

Post by totten »

Great skills,keep up the pics. tony
1966 f-100 ranger,red and white,240,cruiseomatic,3.00 gear,a/c.
Post Reply