
Sully's 1964 Project
-
Reds Rod Shop

- Posts: 317
- Joined: January 11, 2009, 6:43 pm
- Location: Anderson, SC
Welcome to the club from SC. Nice looking build thread and shop you have. Keep the updates coming and the pics.
Red
My 1964 Restomod Project http://fordtruk.com/forums/viewtopic.ph ... sc&start=0
My 1964 Restomod Project http://fordtruk.com/forums/viewtopic.ph ... sc&start=0
-
Gary Seymour

- Posts: 1192
- Joined: September 15, 2006, 5:17 am
- Location: Brown County, Indiana

Got the kit from these guys:
http://www.ndgearheadscruiserproducts.com/id21.htm
The basic "kit" comes with the bracket and the pitman arm. They can supply EVERYTHING, but if you go that route, it's cheaper to go with the No Limit rack and pinion kit.
I bought the kit ONLY and shopped around for the parts. The trickiest part is the universal joint connection at the box. I found a steering box on feebay and made sure the universal came with it. The steering box is from an 84 Toyota 4x4 if my memory serves me. They steer the same as a straight axle Ford (front to rear action).
I have about $500 in the whole setup. In retrospect I could have done the R&P sterring for about the same price IF I assembled the parts myself from different vendors (Borgeson, Flaming River, etc) and fabbed the mounts myself.
I have been trying to sell this setup ($400) to raise the funds to do a R&P. But if it doesn't sell, this setup will work fine.
I bent the steering arm down 1.5" and moved the hole in the pitman arm up 1.5" because of the flipped axle. The flipped axle with the stock spring pack is a 4-4.5" relocation so I have the pitman arm within 1" of the original angle. This should keep bump steer from being a problem. When I have full weight on the suspension the pitman arm should be very similar in angle to the frame.
The steering stops on the axle and the internal stops in the steering box are about the same.
http://www.ndgearheadscruiserproducts.com/id21.htm
The basic "kit" comes with the bracket and the pitman arm. They can supply EVERYTHING, but if you go that route, it's cheaper to go with the No Limit rack and pinion kit.
I bought the kit ONLY and shopped around for the parts. The trickiest part is the universal joint connection at the box. I found a steering box on feebay and made sure the universal came with it. The steering box is from an 84 Toyota 4x4 if my memory serves me. They steer the same as a straight axle Ford (front to rear action).
I have about $500 in the whole setup. In retrospect I could have done the R&P sterring for about the same price IF I assembled the parts myself from different vendors (Borgeson, Flaming River, etc) and fabbed the mounts myself.
I have been trying to sell this setup ($400) to raise the funds to do a R&P. But if it doesn't sell, this setup will work fine.
I bent the steering arm down 1.5" and moved the hole in the pitman arm up 1.5" because of the flipped axle. The flipped axle with the stock spring pack is a 4-4.5" relocation so I have the pitman arm within 1" of the original angle. This should keep bump steer from being a problem. When I have full weight on the suspension the pitman arm should be very similar in angle to the frame.
The steering stops on the axle and the internal stops in the steering box are about the same.
If thou bleedest not, thou workest not. - Hezekiah 2:12
I made those. They are 1x2 tube steel (two pieces each side welded together) with a 1/4" thick plate connecting them and drilled for the U-bolts. It was a very simple part to fab even if you have rudimentary welding skills (like me). A spring shop can fab the U-bolts. FYI - I stole this basic premise from the other Ford truck site.ezernut9mm wrote:i really like the pieces he made for the front flip. think he could make another set? lol. i need to make something like that for mine.

If thou bleedest not, thou workest not. - Hezekiah 2:12


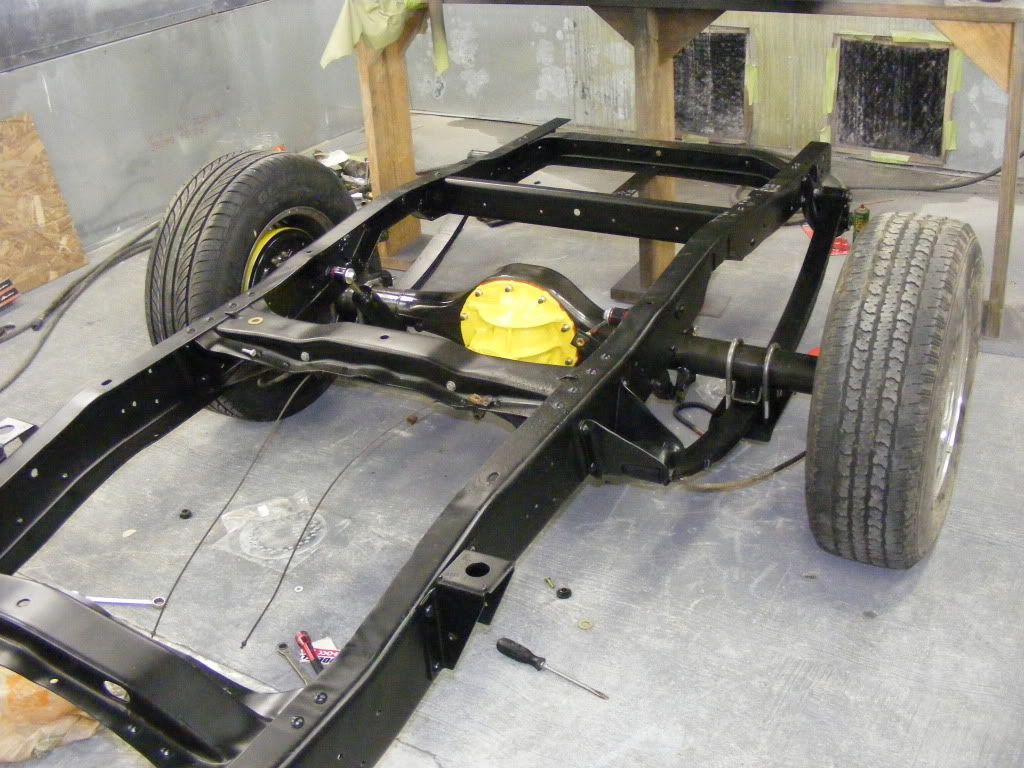


Got the engine/tranny in and bolted down today. It's a REAL good thing my buddy has a couple of parts trucks. I discovered the 3" offset of the drivetrain by accident. I bought the tranny crossmember from speedway and it was too high.
So we pulled the one out of his 65 for comparison and the speedway crossmember was about 1" taller in the chassis. He told me I could have the stock crossmember. When I lined it up in my chassis, I discovered the through-bolt hole was exactly 3" offset to the right. I went out and measured the centerline of the crank with the 352 in his '66. It was 2.5" offset to the right. The frame is 1/2" wider at the front of the engine then it is at the trans crossmember.
Some of you guys are saying, "duh, newbie."
The problem is, the speedway crossmember centers the tranny and the speedway mounts for the 61-64 with a SBF also center the engine in the engine compartment. This creates a clearance issue with the toyota steering box and exhaust. Even with the CORRECT offset, I learned that factory mustang shorties don't work (see last picture)


So we pulled the one out of his 65 for comparison and the speedway crossmember was about 1" taller in the chassis. He told me I could have the stock crossmember. When I lined it up in my chassis, I discovered the through-bolt hole was exactly 3" offset to the right. I went out and measured the centerline of the crank with the 352 in his '66. It was 2.5" offset to the right. The frame is 1/2" wider at the front of the engine then it is at the trans crossmember.
Some of you guys are saying, "duh, newbie."
The problem is, the speedway crossmember centers the tranny and the speedway mounts for the 61-64 with a SBF also center the engine in the engine compartment. This creates a clearance issue with the toyota steering box and exhaust. Even with the CORRECT offset, I learned that factory mustang shorties don't work (see last picture)
If thou bleedest not, thou workest not. - Hezekiah 2:12

Don't know if this will help or not.
Your mounts look like they hold the engine in a similar position to mine and have about the same clearances around them. I did have to cut the crossmember though - going to weld plates that extend below the collectors, and have another that bolts to the welded on ones. I will then weld a couple pieces of tubing to connect the removable ones. That crossmember doesn't just hold up the Y block - ties the rear spring mounts together so the "structure" needs replaced.
I got these from a friend - pretty sure they are for a mid - late 70s F 150 (dentside) with a 302. They are Hedman Headers.
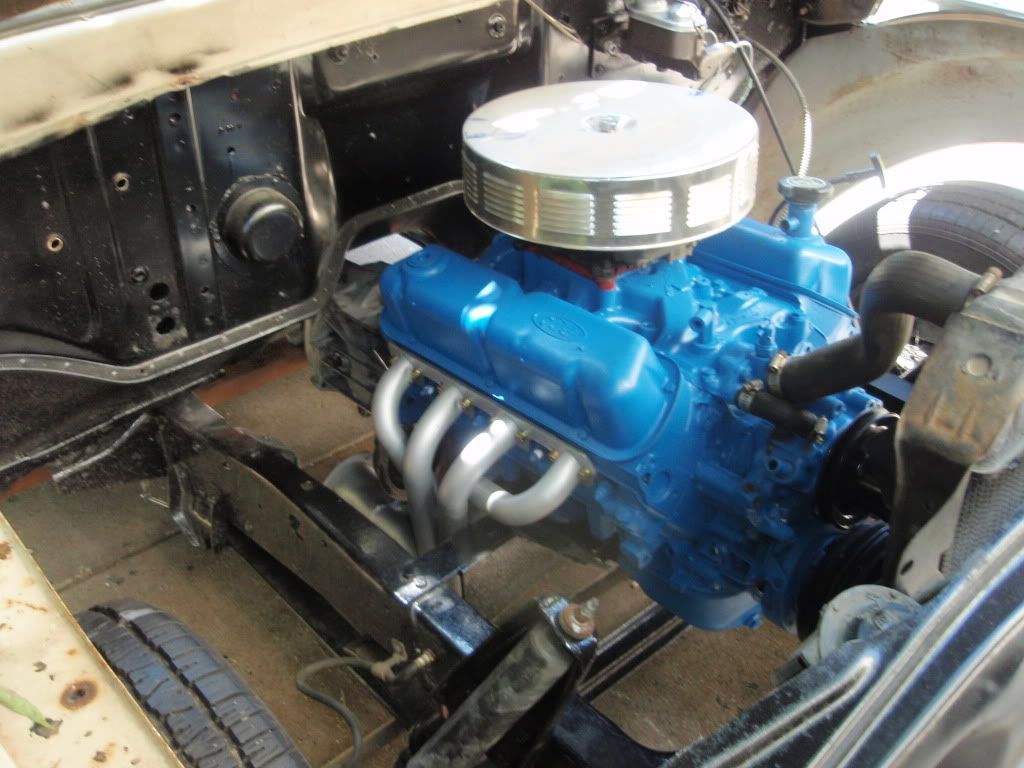
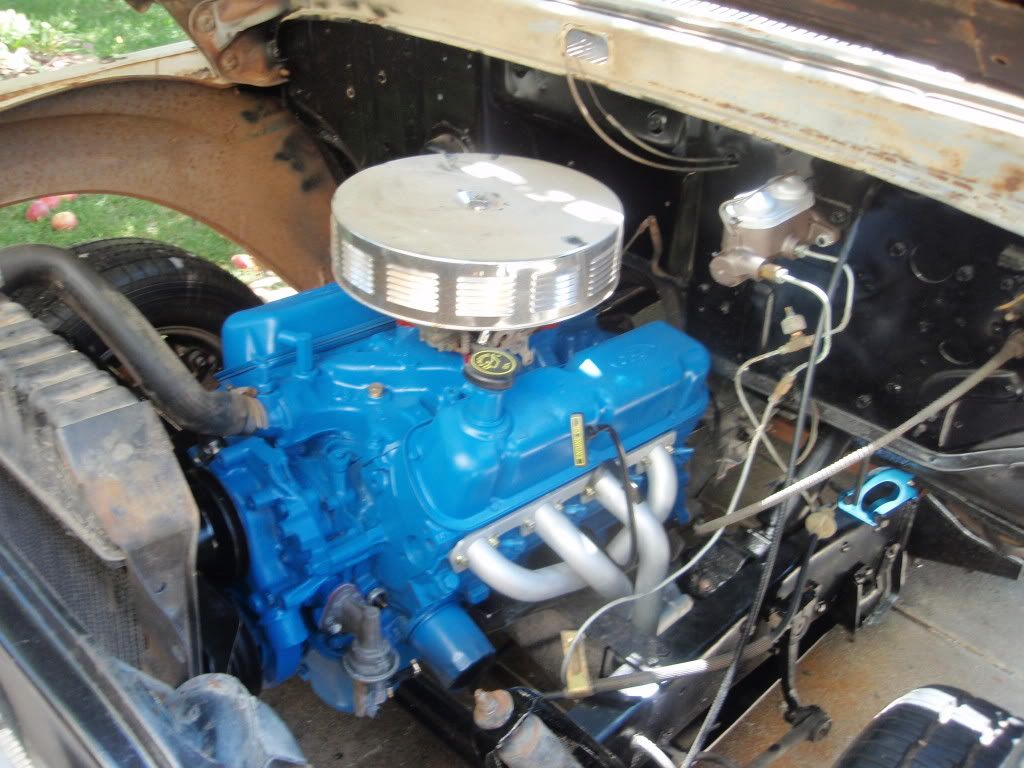
Your mounts look like they hold the engine in a similar position to mine and have about the same clearances around them. I did have to cut the crossmember though - going to weld plates that extend below the collectors, and have another that bolts to the welded on ones. I will then weld a couple pieces of tubing to connect the removable ones. That crossmember doesn't just hold up the Y block - ties the rear spring mounts together so the "structure" needs replaced.
I got these from a friend - pretty sure they are for a mid - late 70s F 150 (dentside) with a 302. They are Hedman Headers.
Last edited by Greg D on February 21, 2011, 9:43 pm, edited 1 time in total.
1964 F 100 - I am going to do "something" with it.......
viewtopic.php?f=32&t=15942
1987 Mustang LX Convertible, 2.3 Auto - cruiser.
1994 F 150 XLT 2WD
~ Yes - I adopted another cat..............
Cam L Milan,
You'll be missed my friend.
viewtopic.php?f=32&t=15942
1987 Mustang LX Convertible, 2.3 Auto - cruiser.
1994 F 150 XLT 2WD
~ Yes - I adopted another cat..............
Cam L Milan,
You'll be missed my friend.
I tried a set of Mustang shorties too - same exact problem only worse with the stock steering box.
I was editing my post while you replied - more info for you to look at.
I was editing my post while you replied - more info for you to look at.
1964 F 100 - I am going to do "something" with it.......
viewtopic.php?f=32&t=15942
1987 Mustang LX Convertible, 2.3 Auto - cruiser.
1994 F 150 XLT 2WD
~ Yes - I adopted another cat..............
Cam L Milan,
You'll be missed my friend.
viewtopic.php?f=32&t=15942
1987 Mustang LX Convertible, 2.3 Auto - cruiser.
1994 F 150 XLT 2WD
~ Yes - I adopted another cat..............
Cam L Milan,
You'll be missed my friend.
I didn't replace the crossmember after I removed it, and the automatic tranny doesn't leave any room for a replacement of any kind.Greg D wrote:I did have to cut the crossmember though - going to weld plates that extend below the collectors, and have another that bolts to the welded on ones. I will then weld a couple pieces of tubing to connect the removable ones. That crossmember doesn't just hold up the Y block - ties the rear spring mounts together so the "structure" needs replaced.
I got these from a friend - pretty sure they are for a mid - late 70s F 150 (dentside) with a 302. They are Hedman Headers.
If thou bleedest not, thou workest not. - Hezekiah 2:12


When you welded the rear seam, did you weld up the radius all the way to the front?????? I took a piece of 3/16 cold roll steel and welded it in there to complete that radius up to the front of the bed. Nobody notices it except for me and a few slick owners. It was still worth the extra time to do.
Kevin
Kevin
kstones63
_______________________________________
63 F100
29 Ford Sedan Delivery
99 F250 PSD, 4x4, CC
95 F350 Flatbed Dually Diesel
_______________________________________
63 F100
29 Ford Sedan Delivery
99 F250 PSD, 4x4, CC
95 F350 Flatbed Dually Diesel
No we blended it. so the horizontal seam transitions to solid. You don't notice it unless you are looking for it.
This started as a "scuff and paint" but project creep attacked. At this point I just want to get it done. This is for my daughter, and it's holding up MY project.
This started as a "scuff and paint" but project creep attacked. At this point I just want to get it done. This is for my daughter, and it's holding up MY project.
If thou bleedest not, thou workest not. - Hezekiah 2:12
I noticed a couple of the front axle flips on a couple builds. What is your clearance from the axle to oil pan? It looks like your engine sits back a little more than a 292 would, is that for the flip?
Also, for the rear flip, did you have to add more angle to the perch for the higher axle position? I plan on doing this and wondering if added tilt is needed.
I am a big newby at this stuff.
Thanks,
Also, for the rear flip, did you have to add more angle to the perch for the higher axle position? I plan on doing this and wondering if added tilt is needed.
I am a big newby at this stuff.
Thanks,
1964 F100, 292ci
1963 Buick Wildcat, 401ci
They just don't make them like they used to.
1963 Buick Wildcat, 401ci
They just don't make them like they used to.
I used the dual sump pan for the 302 and it has TONS of clearance. I could acutally remove the pan with ease if I wanted to. The rear axle flip: I tried to calculate it correctly but I'm off a little. I will use angled shims to get the pinion angle right.
The engine set back is based on the allowance of room from and back for working on it.
The engine set back is based on the allowance of room from and back for working on it.
If thou bleedest not, thou workest not. - Hezekiah 2:12


