
Slickmainer 1961 unibody
-
slickmainer

- Posts: 2555
- Joined: October 8, 2007, 6:41 pm
- Location: Auburn Maine
- Contact:

Re: Slickmainer 1961 unibody
ok, just checking, that's what I figured
--Gregg--
you can't get there from here
you can't get there from here

Re: Slickmainer 1961 unibody
Flashback is the only place I found that carries them by the way. I checked everywhere I knew and some places that I didn't. 
Family First!
-
slickmainer
- Posts: 2555
- Joined: October 8, 2007, 6:41 pm
- Location: Auburn Maine
- Contact:
Re: Slickmainer 1961 unibody
found more rust. side of the cab where the cab mounts meet the cab. basically the wall between the cab mounts and where the door hinges are. that is gone. mounts still look solid though unless there a box design and had a back wall to them, then they aren't so good. ha.
--Gregg--
you can't get there from here
you can't get there from here
-
slickmainer
- Posts: 2555
- Joined: October 8, 2007, 6:41 pm
- Location: Auburn Maine
- Contact:
Re: Slickmainer 1961 unibody
picked up some Ospho from my local Marine supply shop. They had another one they recommended call corroseal (http://www.corroseal.com/), it looked to do the same thing but was more expensive than the Ospho.
my plan.
I'll be working on the roof line so Im going to cut out the old rusty stuff, sand it down, apply the ospho to the metal in the drip rail area, let it dry, then sand off the very edges and weld in the new metal, grind the welds, then per Skip, use USC All-Metal Premium Aluminum filler to smooth out the roof line, the hit it with a primer.
I hope that plan allows me to work on other areas of the truck and it not rust again before I have time to get the whole truck done or get real paint on the roof. It's all outside work so i have to watch the weather, humidity and such since all I have is a tarp.
SO, would it be best to apply the Ospho before I weld in the new metal, or cut out the old, sand, and then weld in the new, then hit it all with ospho?
my plan.
I'll be working on the roof line so Im going to cut out the old rusty stuff, sand it down, apply the ospho to the metal in the drip rail area, let it dry, then sand off the very edges and weld in the new metal, grind the welds, then per Skip, use USC All-Metal Premium Aluminum filler to smooth out the roof line, the hit it with a primer.
I hope that plan allows me to work on other areas of the truck and it not rust again before I have time to get the whole truck done or get real paint on the roof. It's all outside work so i have to watch the weather, humidity and such since all I have is a tarp.
SO, would it be best to apply the Ospho before I weld in the new metal, or cut out the old, sand, and then weld in the new, then hit it all with ospho?
--Gregg--
you can't get there from here
you can't get there from here

Re: Slickmainer 1961 unibody
Be careful with the heat! I ended up with more warpage than I was comfortable with. I used a POR 15 prep product (zinc oxide), but then lightly ground it prior to welding, although label stated no need. After those results, and the consequent purchase of a big-window conversion, I just used Belzona on my project this week.
Same process, grind, POR15 prep, Grind, Belzona, grind, POR15 prep until ready to coat with high-build primer-surfacer.
I'll post before and after if it quits raining so I can shoot the after!
I am now considering structural adhesive and Belzona for the big window conversion. I want to cover seams and eliminate drip rails, and I'm just too lazy to do it right by filling with rod, then stitch welding, then finish welding.
Paul
Same process, grind, POR15 prep, Grind, Belzona, grind, POR15 prep until ready to coat with high-build primer-surfacer.
I'll post before and after if it quits raining so I can shoot the after!
I am now considering structural adhesive and Belzona for the big window conversion. I want to cover seams and eliminate drip rails, and I'm just too lazy to do it right by filling with rod, then stitch welding, then finish welding.
Paul
The Ford Orphanage
Life's too short for boring vehicles!
My quest to develop a universal solvent is held up by the lack of a storage container.
Paul
Life's too short for boring vehicles!
My quest to develop a universal solvent is held up by the lack of a storage container.
Paul
-
slickmainer
- Posts: 2555
- Joined: October 8, 2007, 6:41 pm
- Location: Auburn Maine
- Contact:
Re: Slickmainer 1961 unibody
Bought an electric 3 inch high speed cut off tool since I dont have a compressor. Worked great for cutting out the roof rust


Hope to make patches tommorow and weld them in next weekend
Hope to make patches tommorow and weld them in next weekend
--Gregg--
you can't get there from here
you can't get there from here
-
slickmainer
- Posts: 2555
- Joined: October 8, 2007, 6:41 pm
- Location: Auburn Maine
- Contact:
Re: Slickmainer 1961 unibody
Here is the front of my bed with no prep work. I got lucky here

--Gregg--
you can't get there from here
you can't get there from here
-
slickmainer
- Posts: 2555
- Joined: October 8, 2007, 6:41 pm
- Location: Auburn Maine
- Contact:
Re: Slickmainer 1961 unibody
no such thing as quickly removing a bumper. holy hell. an hour later and 6 less bumper bolts it fell off, had to grind the heads off the 3 bolts per side. 
also notice that there is no easy way of removing the sill/rock guard.all my bolts just spin... lovely.
also notice that there is no easy way of removing the sill/rock guard.all my bolts just spin... lovely.
--Gregg--
you can't get there from here
you can't get there from here


Re: Slickmainer 1961 unibody
Ive found it easier to remove the lower grille or splash pan by removing the core support with it still attached and then remove it.slickmainer wrote:no such thing as quickly removing a bumper. holy hell. an hour later and 6 less bumper bolts it fell off, had to grind the heads off the 3 bolts per side.
also notice that there is no easy way of removing the sill/rock guard.all my bolts just spin... lovely.
1963 F250 4x4x292
1965 F100 4x4x352
1998 F150 4x4x4.6
2001 Sport Track 4x4x4.0
In case you are wondering thats Ireland......Freedom is not Free!!!!!!!!
Heritage country Flag
1965 F100 4x4x352
1998 F150 4x4x4.6
2001 Sport Track 4x4x4.0
In case you are wondering thats Ireland......Freedom is not Free!!!!!!!!
Heritage country Flag
-
slickmainer
- Posts: 2555
- Joined: October 8, 2007, 6:41 pm
- Location: Auburn Maine
- Contact:
Re: Slickmainer 1961 unibody
well I tried to weld in the new roof pieces but found out that I didn't have a 20amp outlet on the outside of the house, so till I can get that worked out I tore into the front clip.
It took all weekend to get it off and finally after drilling out one bolt, and endless hours of using vice grips to hold a spinning nut it was loose. My lovely wife helped me lift it off and move it off the the side where I was able to work on it piece by piece. it's still a work in progress as im soaking all the bolts that were being a PITA.
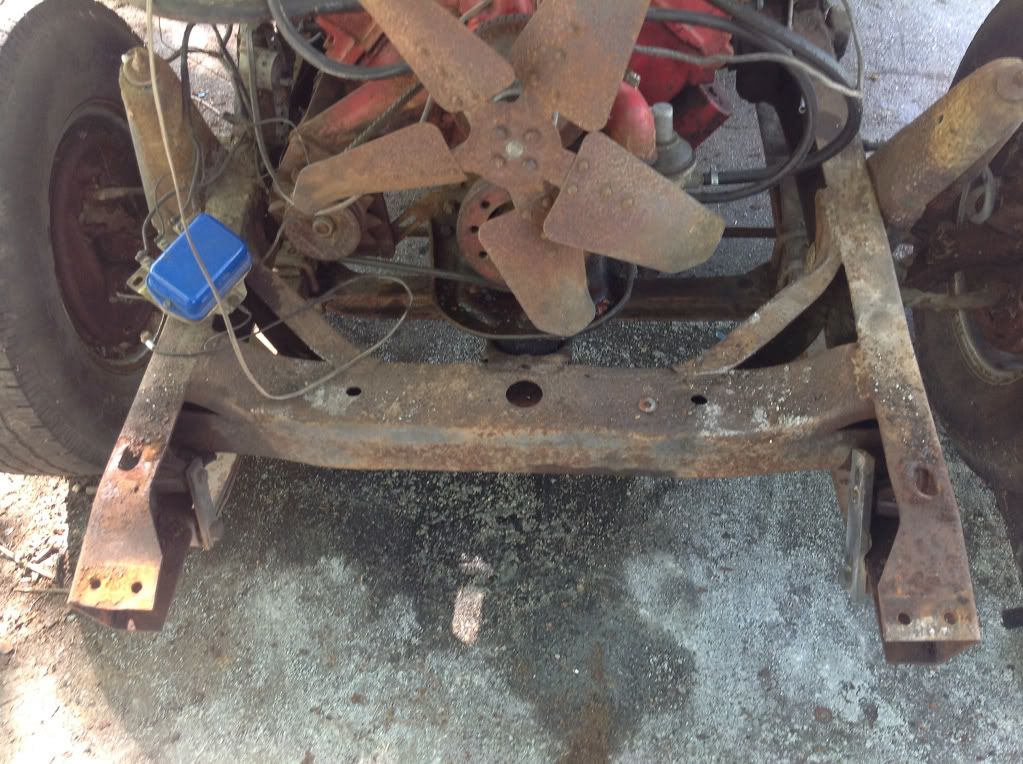


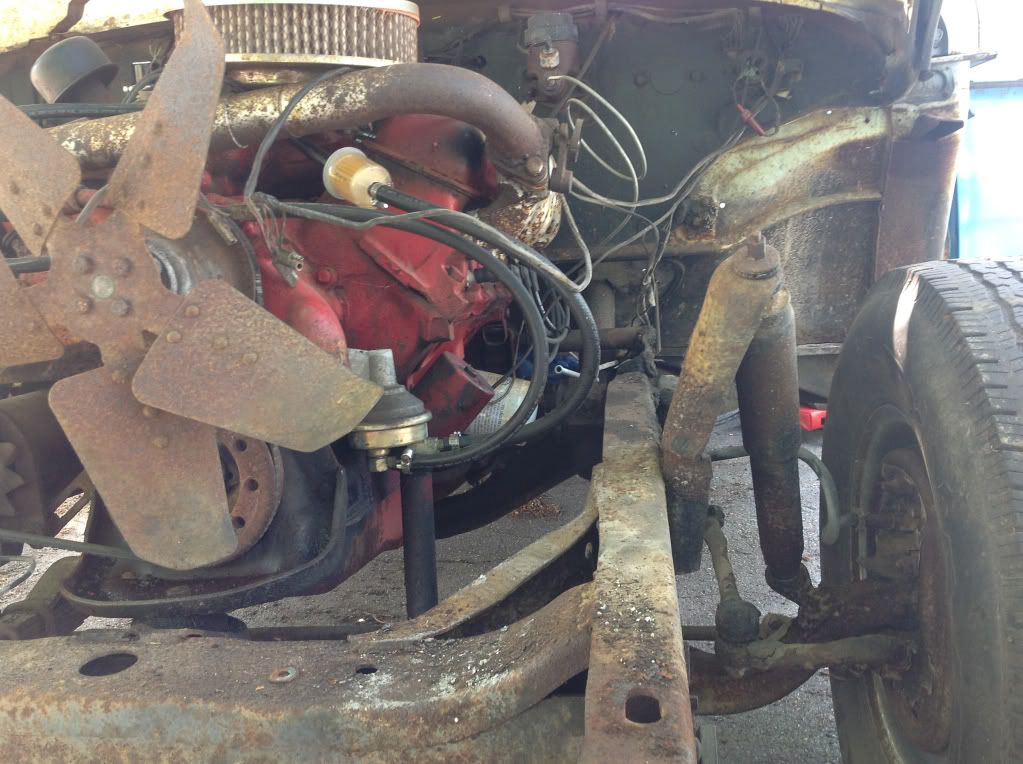

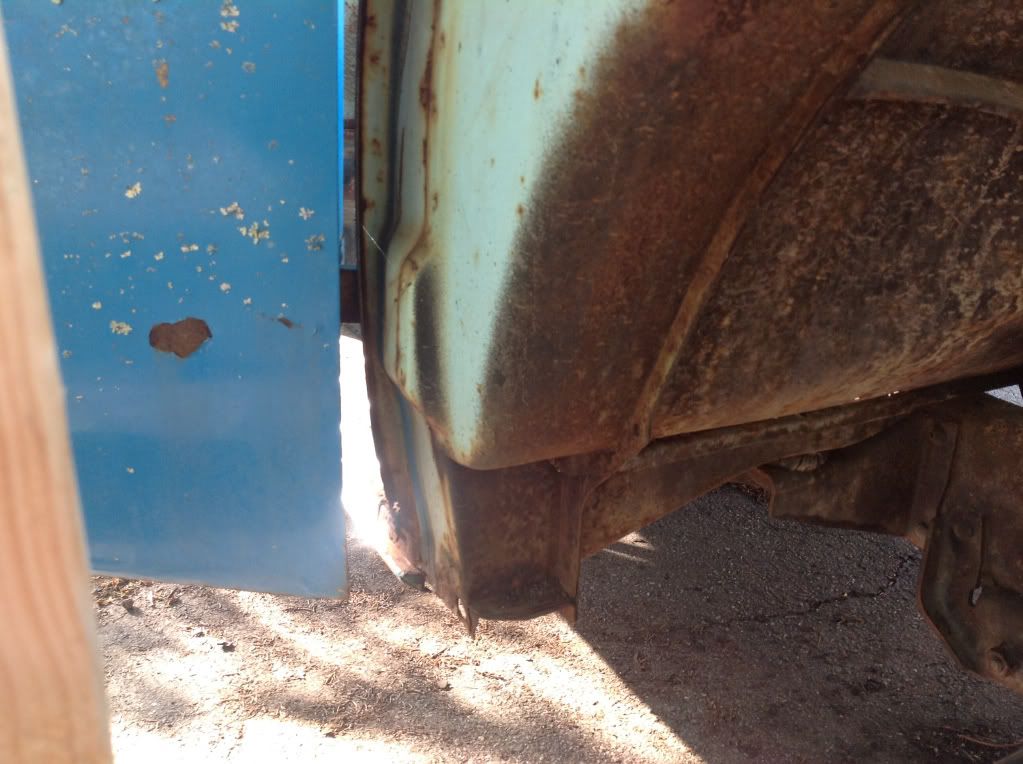
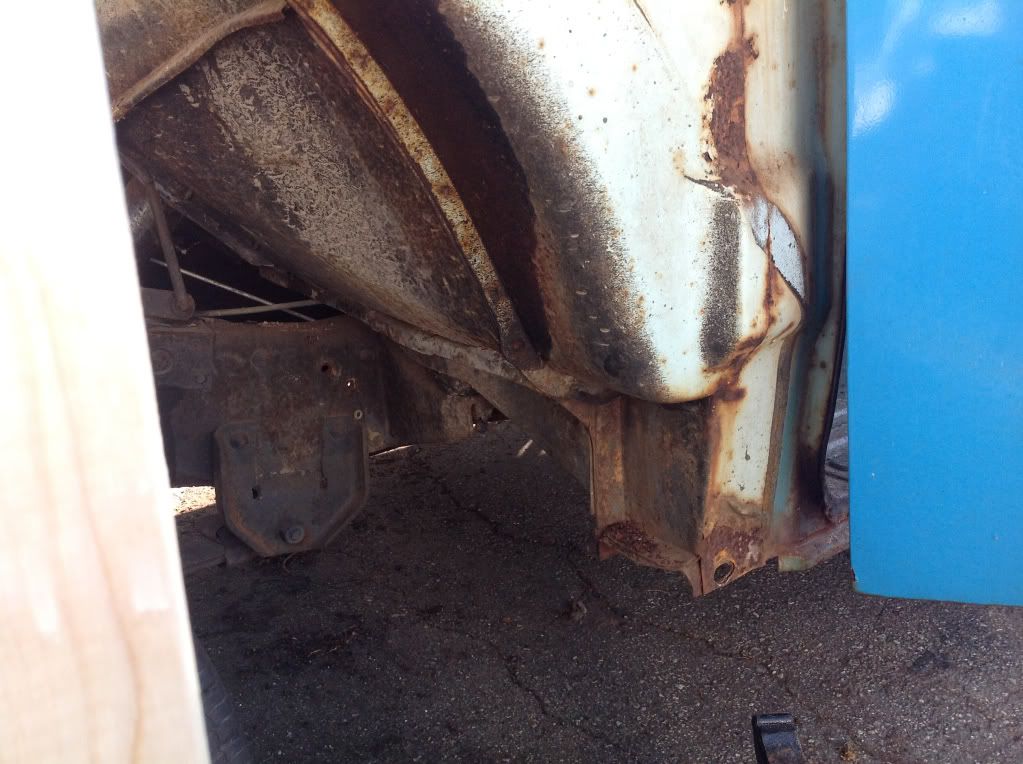


It took all weekend to get it off and finally after drilling out one bolt, and endless hours of using vice grips to hold a spinning nut it was loose. My lovely wife helped me lift it off and move it off the the side where I was able to work on it piece by piece. it's still a work in progress as im soaking all the bolts that were being a PITA.
--Gregg--
you can't get there from here
you can't get there from here
-
slickmainer
- Posts: 2555
- Joined: October 8, 2007, 6:41 pm
- Location: Auburn Maine
- Contact:
Re: Slickmainer 1961 unibody
got my scraper and flat edge screwdriver out and under the truck this weekend. I was working on all the caked in dirt on the frame and cross members. I still didn't get it all after 3 hours. getting to the point where my pressure washer should finish up the job.
also started to repair my steering wheel, photos on that later.
also started to repair my steering wheel, photos on that later.
--Gregg--
you can't get there from here
you can't get there from here

Re: Slickmainer 1961 unibody
Nice job Gregg !
I am still mucking around with a lower valence/stone deflector. Even with the radiator support cut, it is still a bear.
I am still mucking around with a lower valence/stone deflector. Even with the radiator support cut, it is still a bear.
Darren
2010 F150
1967 Mustang Coupe
1966 F100
2010 F150
1967 Mustang Coupe
1966 F100
-
rickairmedic
- Posts: 1394
- Joined: July 19, 2006, 9:27 pm
- Location: Louisville,Ky
Re: Slickmainer 1961 unibody
Gregg they must not use salt up there that truck is crazy clean compared to either of my uni's.
Rick
Rick
if it aint broke fix it till it is 
-
slickmainer
- Posts: 2555
- Joined: October 8, 2007, 6:41 pm
- Location: Auburn Maine
- Contact:
Re: Slickmainer 1961 unibody
It came from Idaho with a 4 year layover in Connecticut. It wasn't driven in CT, just bought and sat. which is probably why the roof is so messed up. ocean air and the salt
--Gregg--
you can't get there from here
you can't get there from here
-
slickmainer
- Posts: 2555
- Joined: October 8, 2007, 6:41 pm
- Location: Auburn Maine
- Contact:
Re: Slickmainer 1961 unibody
had a go at cleaning up the front clip parts today. purple power, sand paper, elbow grease, rattle can primer just to keep it all covered while in my crappy leaky shed. the outer portions of the fenders are pretty good and will probably just leave them as is till later in the process.
what Im starting with
Fenders from the uni


upper valance from the uni


driver inner fender from uni


passenger inner fender from garbz


stone guard from garbz


core from craigslist


Going to go with just some rustoleum primer for now. still unsure what I want I want it all to look like in the end so I wont put any color on them till I get the cab all welded up and the frame cleaned up.
had to snag one of the 66 in the yard

what Im starting with
Fenders from the uni
upper valance from the uni
driver inner fender from uni
passenger inner fender from garbz
stone guard from garbz
core from craigslist
Going to go with just some rustoleum primer for now. still unsure what I want I want it all to look like in the end so I wont put any color on them till I get the cab all welded up and the frame cleaned up.
had to snag one of the 66 in the yard
--Gregg--
you can't get there from here
you can't get there from here
-
1965fordf100
- Posts: 483
- Joined: February 25, 2008, 3:32 pm
- Location: Reno, NV
-
slickmainer
- Posts: 2555
- Joined: October 8, 2007, 6:41 pm
- Location: Auburn Maine
- Contact:
Re: Slickmainer 1961 unibody
yeah probably worth more than the whole truck.
--Gregg--
you can't get there from here
you can't get there from here
-
slickmainer
- Posts: 2555
- Joined: October 8, 2007, 6:41 pm
- Location: Auburn Maine
- Contact:
Re: Slickmainer 1961 unibody
got the inner fenders into primer (front and back), and inside of fenders coated with rust encapsulator. going to scuff the ERE and the spray with a topcoat to match the inner fenders. Id thought of doing a bedliner material on the back of the fenders and the backs of the inner fenders but though the next owner might not like it so I didn't.
--Gregg--
you can't get there from here
you can't get there from here
-
1965fordf100
- Posts: 483
- Joined: February 25, 2008, 3:32 pm
- Location: Reno, NV
Re: Slickmainer 1961 unibody
I just used rustoleum hammered...I turned out nice, I hope it holds up as good as it looks
Phil
-
slickmainer
- Posts: 2555
- Joined: October 8, 2007, 6:41 pm
- Location: Auburn Maine
- Contact:
Re: Slickmainer 1961 unibody
Got the roof welded up and all the holes filled. The coated the inside of the roof with Eastwood rust encapsulator as well as the back of the cab down to the floor. Up next is to buy some spray in ERE for behind the side panel and inside the torque boxes. The the floor boards and passenger side lower pillar. Then finally ERE the floor
--Gregg--
you can't get there from here
you can't get there from here