64 F100

A place just for our project & build threads.

Moderators: Casey 65, Kid

User avatar
ken462
Posts: 113
Joined: October 12, 2011, 2:55 pm
Location: New Mexico

Re: 64 F100

Post by ken462 »

@ Santi. I know what you mean...would be nice to have another slick project close by to compare notes with. As my thread notes, this is my first time welding sheet metal on a vehicle. I did do some stuff on an old trailer with flux core wire that got me into the basics of welding but welding sheet metal with solid core wire & gas is different. I've found that it's all about the welder setting...set the dials up right and it lays down real good w/penetration and no blow through....have the setting off and it either burns right through or "balls-up" on top. I learned to test the setting on the same size material you'll be welding and it cuts down on the mistakes on the truck. Good grinding wheel helps a lot though :D

I used Google & you-tube to teach myself...lots of informative stuff out there. Good thing is most of the welding was underneath where no one will see it but me :D I'm sure you'll do fine, it's like anything else, the more you do it the more you learn and the better the results get.

I make it up to Ablq every now and then, maybe I'll get with you the next time and we can swap Slick war stories....

@ Gregg. I'm having the shop do just the machine work. I'll assemble, stick in freeze plugs, paint etc. I have rebuilt a few engines over the years and its not too difficult if you have a few good books to follow and take your time. Kits for these Y-blocks seems to run ~$700 to $1,000 or so and the machine work, depending on what needs doing, will run somewhere around $800 - 1200...or so. So looks like it will come in right were Unibody Madness stated his cost was. Thought about trying to find a replacement but then you never know what you're getting. Decided to just spend the $ up front.

Ken
User avatar
Santi
Posts: 150
Joined: July 31, 2007, 2:45 pm
Location: Albuquerque, NM

Re: 64 F100

Post by Santi »

Ken,

Sounds good.. Also, where did you get your metal to do the pillars and stuff? What gauge did you get? I bought my floor pans from Dennis Carpenter I believe but I need extra metal for the almost the exact locations you welded in already.

Thanks
User avatar
ken462
Posts: 113
Joined: October 12, 2011, 2:55 pm
Location: New Mexico

Re: 64 F100

Post by ken462 »

Santi, I went to a local Pipe & steel place and bought a few scrap pieces of 16 gauge steel in a few different sizes, like 12" X 18" or so. I think I paid about $17 for the three pieces I bought. You can get it at Home Depot, Lowe's or TS but man are they proud of they're stuff.
User avatar
ken462
Posts: 113
Joined: October 12, 2011, 2:55 pm
Location: New Mexico

Re: 64 F100

Post by ken462 »

Well, was out of town for a week but did get a few things done since my last update.

Sent a few items to the blaster, inner fenders, top & bottom valance, and a few other small items. Sprayed them with epoxy primer last week:
Image

Guy selling the Radiator Support it Tucson stiffed me so I'm back to looking at repairing mine:
Image
Image

Front fenders got blasted and I've repaired a few dents. Hope to get them in primer this weekend.
User avatar
ken462
Posts: 113
Joined: October 12, 2011, 2:55 pm
Location: New Mexico

Re: 64 F100

Post by ken462 »

Found a fairly rusty hood at the local junk yard but it had a good front lip section on it that I was able to use to repair mine.

Hood from junkyard:
Image
Even though the hood looks OK in the picture..those bondo spots are covering holes...4 of them

My hood:
Image

Junkyard hood before cutting section out;
Image

My hood with repair section tacked in.
Image

I since finished the welding on the hood but didn't update the photo's yet.

Also got around to tearing into my steering box...it was trashed and the sector shaft was broken. After checking around decided to buy a manufactured one from carsteering.com, they had the best price I could find with good reviews. It should arrive late this week.

Broken tab on sector shaft:
Image

Trashed bushings:
Image


Also got the front fenders in epoxy primer and got the cab and radiator support back from the blaster. No pictures on hand, I'll post some later.

Ken
User avatar
ken462
Posts: 113
Joined: October 12, 2011, 2:55 pm
Location: New Mexico

Re: 64 F100

Post by ken462 »

Nice clean Cab:
Image
Image

Bottom with POR 15:
Image

Just a little bondo to remove and repair:
Image
User avatar
slickmainer
Posts: 2555
Joined: October 8, 2007, 6:41 pm
Location: Auburn Maine
Contact:
United States of America

Re: 64 F100

Post by slickmainer »

looks great
--Gregg--
you can't get there from here
Rusted64
Posts: 389
Joined: January 13, 2011, 3:34 pm
Location: The Woodlands, TX
United States of America

Re: 64 F100

Post by Rusted64 »

Looking good man.

Looks a lot like my cab. POR 15 and grey primer.

That POR 15 stuff is some great stuff.
1964 F100, 292ci

1963 Buick Wildcat, 401ci

They just don't make them like they used to.
User avatar
ken462
Posts: 113
Joined: October 12, 2011, 2:55 pm
Location: New Mexico

Re: 64 F100

Post by ken462 »

Thanks Gregg.

Rusted, the Por 15 does appear to be great...I can tell you that it doesn't come off the skin very fast, been wearing a few spots on my wrist the last week or so...just has to wear off I reckon cuz it sure does wash/scrub off!
User avatar
ken462
Posts: 113
Joined: October 12, 2011, 2:55 pm
Location: New Mexico

Re: 64 F100

Post by ken462 »

Core support repaired and covered in POR:
Image
Image
Work on the cab continues:
Image
User avatar
ken462
Posts: 113
Joined: October 12, 2011, 2:55 pm
Location: New Mexico

Re: 64 F100

Post by ken462 »

After three weeks molesting my cab with a hammer, dolly, filler & sandpaper, I was able to get a coat of epoxy primer on it. Now it's back to the hammer, dolly, filler & sandpaper to get all the spots that I couldn't see before the paint was on it :shock:
Image
Image
Image
samw
Posts: 3
Joined: January 5, 2012, 10:56 pm

Re: 64 F100

Post by samw »

looks good my cab rusted in the same places.almost gave up on it after seeing how yours turned out ready to do some work on it.thanks
User avatar
ken462
Posts: 113
Joined: October 12, 2011, 2:55 pm
Location: New Mexico

Re: 64 F100

Post by ken462 »

SAMW,
Don't know your skill level but mine was zero when it came to working with metal and welding. If I can do it, I'm certain anyone else can 8)

Bodywork is coming along slow as I'm learning as I go and having to redo my work most of the time...but I get a little better with each repair.

I'm almost certain it will be ready for Slick Stock in 2014!
samw
Posts: 3
Joined: January 5, 2012, 10:56 pm

Re: 64 F100

Post by samw »

looks good keep posting pics.thinking of putting mine on a 73 to 79 frame.have power steering and brakes.
User avatar
ken462
Posts: 113
Joined: October 12, 2011, 2:55 pm
Location: New Mexico

Re: 64 F100

Post by ken462 »

Slowed down a bit once I got the cab in epoxy primer. I'm just cleaning/sandblasting/sanding and priming small parts now. I'm turning my 20' X 26" RV carport into a paint booth and waiting for the end walls to arrive before I do any of the high build primer, sanding and top coats...garage is just too small.
User avatar
bobenhotep
Posts: 911
Joined: January 9, 2007, 4:15 am
Location: Las Cruces, NM
Contact:
United States of America

Re: 64 F100

Post by bobenhotep »

I looked over your build, and I like your work. I now want to tear into my truck and repair all of the oddball rust damage from years of being a georgia truck. I am just over the mountain in Las Cruces, for what it's worth...
For every person with a spark of genius, there are a hundred with ignition trouble

My '63 short wrongbed

"The Iron Rhino"
300 I6, 3 spd manual, DS II/ HEI ignition.

Stuff I added to Hints and tricks

-300-6 choke tube repair
-duraspark II/ HEI
-Horn ring contact tube repair
-turn signal indicator fix


Mikhail Kalashnikov and Nikola Tesla are the guys i think of when i build things.

Image
User avatar
ken462
Posts: 113
Joined: October 12, 2011, 2:55 pm
Location: New Mexico

Re: 64 F100

Post by ken462 »

Thanks Bobenhotep, I think we blogged back and forth a few times on the southwest site. I need to get busy again, Daughter graduated from ASU this last weekend...wallet is tore wide open and needs some quiet (unopened) rest to keep alive :shock:

More to come soon I hope.

Ken
User avatar
bobenhotep
Posts: 911
Joined: January 9, 2007, 4:15 am
Location: Las Cruces, NM
Contact:
United States of America

Re: 64 F100

Post by bobenhotep »

Well, if you need the services of an old truck wiring guy give a yell this way.
For every person with a spark of genius, there are a hundred with ignition trouble

My '63 short wrongbed

"The Iron Rhino"
300 I6, 3 spd manual, DS II/ HEI ignition.

Stuff I added to Hints and tricks

-300-6 choke tube repair
-duraspark II/ HEI
-Horn ring contact tube repair
-turn signal indicator fix


Mikhail Kalashnikov and Nikola Tesla are the guys i think of when i build things.

Image
User avatar
ken462
Posts: 113
Joined: October 12, 2011, 2:55 pm
Location: New Mexico

Re: 64 F100

Post by ken462 »

Got back to getting a few things done. Started working on the bed. the one dent I had in the side pulled out better then I thought it would. Welded a nail to the side of it and pulled it out w/vise grips attach to my slide hammer. Didn't get any photo's during the process so here's a before/after. Dent is just to the front/top of theleft rear wheel well:
Image
Image
Image

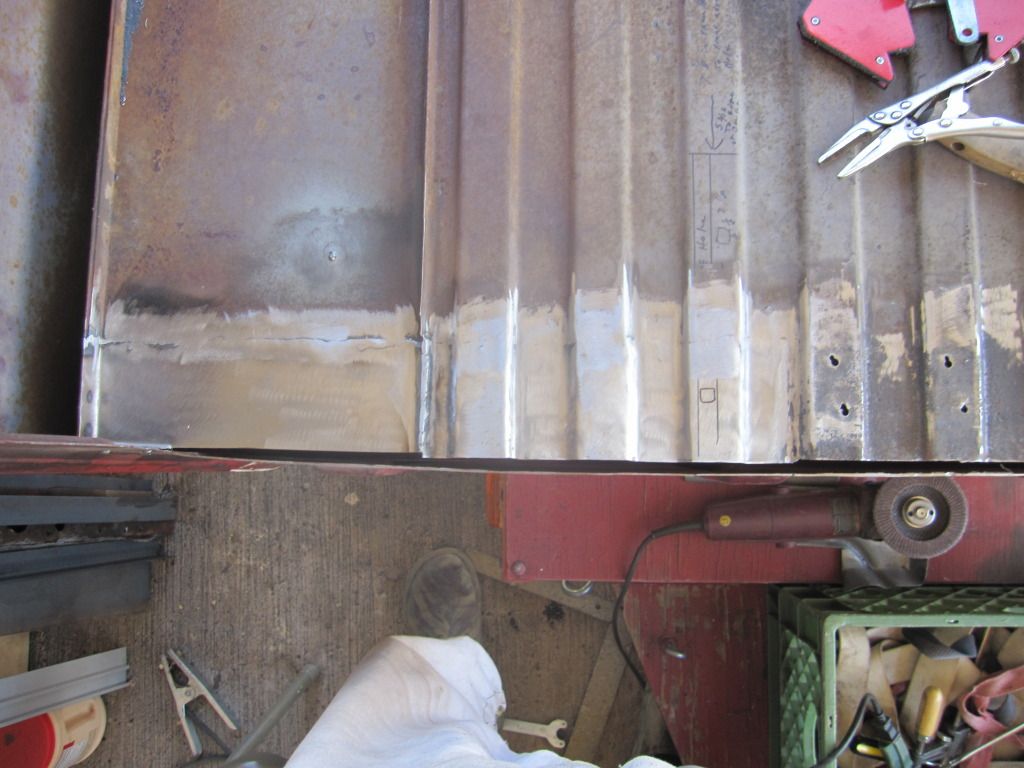
Then I worked on the rust at the front of the bed. Luckily I had a few pieces left from the repoped floor pans that I hadn't use on the cab. Used them to patch the panel on the left & right side of the front of my bed floor that had rusted out. The ridges/valleys where fairly close to the ones in the bed floor...just had to rework them a little. bed is upside down at this point.
Image
Image
Image

Had to remove the front bed brace as it was rusted out beyond repair and currently making a new one. Didn't get pics of that yet.

Also had to patch the bed over the rear brace but didn't get photos until after I had shot them with primer:
Image
Image

Still haven't decided what to do with these bed corners. They look better in the photos then they really are:
Image

Image


Also stopped by the local salvage yard looking for some bed corners...didn't find any but did score another tail gate, which I needed as mine is pretty trashed...more bondo then anything. Still need to get a picture of the new tailgate tho.
MadMaxetc
Posts: 2600
Joined: July 10, 2006, 12:00 pm
Location: Wichita, KS
Contact:
United States of America

Re: 64 F100

Post by MadMaxetc »

Looking good!
Dan
Project: '63 F-100 LWB / 460 / C6 / 2x4
My Build Thread
Post Reply