
hey brian, welcome to the site, and i must say, you've either got mad skills or are a glutton for punishment.
that's a lot of cab rust, but it's a cool looking old truck for sure.
My '65 Stepside "Refresh"....
-
ezernut9mm

- Posts: 9141
- Joined: July 21, 2006, 9:37 pm
- Location: KCMO

-
lastwagen 66

- Posts: 154
- Joined: February 9, 2010, 10:10 pm
- Location: Highland Village, TX (DFW)

Brian, Looking at those pics was an eye-opener! 
Man, you got more rust going there than I could live with on my Slick! Yikes! You did say low budget, so.... you're going to do what to this Slick?

IMHO I think you're starting off in a really deep hole....
Carl
Man, you got more rust going there than I could live with on my Slick! Yikes! You did say low budget, so.... you're going to do what to this Slick?
IMHO I think you're starting off in a really deep hole....
Carl
“What we’ve got here is … failure to communicate.” The Captain, in Cool Hand Luke
‘66 F100 CC Styleside LWB 352, auto "Phoebe" SOLD 2011 - Gone but not Forgotten!
‘01 F-250 Super Duty Crew Cab, 7.3L , 2WD, SB "Crusher II" is my DD....330K and counting.... 9/08/17
‘66 F100 CC Styleside LWB 352, auto "Phoebe" SOLD 2011 - Gone but not Forgotten!
‘01 F-250 Super Duty Crew Cab, 7.3L , 2WD, SB "Crusher II" is my DD....330K and counting.... 9/08/17
-
slickmainer

- Posts: 2555
- Joined: October 8, 2007, 6:41 pm
- Location: Auburn Maine
- Contact:

-
HillBillyF100
- Posts: 77
- Joined: July 16, 2010, 12:57 pm
- Location: Denton, Texas
Ya, it might seem like a lot, but I have dealt with worse...And, the pics that I took kind of blow up the rust, but, that is the only rust on the truck to speak of..cab corners are solid, floor is solid enough, fenders, etc..
As I fix the cancer, I'll be sure to photograph the work..
I really didn't think it was THAT bad...
As I fix the cancer, I'll be sure to photograph the work..
I really didn't think it was THAT bad...
-
F7BIGJOB

- Posts: 1379
- Joined: March 14, 2010, 7:59 am
- Location: West Greenwich, Rhode Island & Providence Plantations
Hi Brian, small round brass float 'snaps' into that hook. should be able to find at any napa of Ford dealer. They are all the same up to mid 90's [on Ford cut a way motorhome chassis]- I know I have 2 at work, I'll provide you with the p/n next week as to where to go to purchase.
The sender itself, I would hook an ohm meter to it and run it full to empty and back and see if it is working.
This post is from watching part of your 2nd video on the top post.
-Steve
 from 'Ro Diland'!!
F7BIGJOB
-Steve
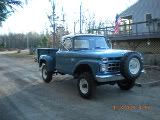
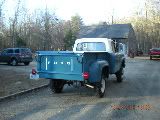
1965 F-250 4x4 Flareside
-Steve
1965 F-250 4x4 Flareside
-
HillBillyF100
- Posts: 77
- Joined: July 16, 2010, 12:57 pm
- Location: Denton, Texas
Hey, thanks for that part number..I did hook up the ohm meter onto the sender..It is bad too..I think I can get the whole thing, (with float) from Dennis Carpenter or LMC for around $50 bucks.. I've just moved onto other things for now..I have to get the body sound, and get it on the road..F7BIGJOB wrote:
Hi Brian, small round brass float 'snaps' into that hook. should be able to find at any napa of Ford dealer. They are all the same up to mid 90's [on Ford cut a way motorhome chassis]- I know I have 2 at work, I'll provide you with the p/n next week as to where to go to purchase.
The sender itself, I would hook an ohm meter to it and run it full to empty and back and see if it is working.
This post is from watching part of your 2nd video on the top post.
-Steve
-
HillBillyF100
- Posts: 77
- Joined: July 16, 2010, 12:57 pm
- Location: Denton, Texas
Ok, so after all the talk about lowering the truck, I have decided to simply just get this thing on the road..With that said, I don't even plan on rebuilding the factory front end..It might be a little loose for awhile, and I'll have to make sure it isn't too "unsafe"..But I really started thinking.."Why spend all that time clipping the front end, when I am not 100% that this thing isn't gonna have some other serious issues"...
So, I'll look at getting some 15" tires for the rims I have, and rebuild the factory drum brakes..(just to get this thing on the road)
And, as others have pointed out here, I do have some rust that needs tending too..So, I'll work on repairing that too..I just think that my time could be spent a bit more wisely on this truck..
So, as far as updates, I took the brush guard off of the front of the truck, I took the mirrors off, and worked up a mental battle plan to attack the body.
Be on the look out for updates involving me redoing the stock brakes.., and getting new tires..I also have to replace some worn out/missing bearings in the steering column...
For those of you who are "keeping tabs" with the project, THANKS!
Brian
So, I'll look at getting some 15" tires for the rims I have, and rebuild the factory drum brakes..(just to get this thing on the road)
And, as others have pointed out here, I do have some rust that needs tending too..So, I'll work on repairing that too..I just think that my time could be spent a bit more wisely on this truck..
So, as far as updates, I took the brush guard off of the front of the truck, I took the mirrors off, and worked up a mental battle plan to attack the body.
Be on the look out for updates involving me redoing the stock brakes.., and getting new tires..I also have to replace some worn out/missing bearings in the steering column...
For those of you who are "keeping tabs" with the project, THANKS!
Brian


-
HillBillyF100
- Posts: 77
- Joined: July 16, 2010, 12:57 pm
- Location: Denton, Texas
-
HillBillyF100
- Posts: 77
- Joined: July 16, 2010, 12:57 pm
- Location: Denton, Texas
Just wanted to let those few who are following this build/refresh, that I have started repairing the rust on the roof of the cab..It will be a slow process, and if you watched the first video, you know that I had intended on just filling over the rust holes with fiberglass..But, when I started to closely inspect the holes, I noticed that the PO had already filled over a lot of the rust with bondo..So, it was then that I decided to fix the rust the right way..I filled one if the holes tonight, and I have gotten a lot of the scrap metal to make the patches for the the larger sections of the rust..I hope to start on those later in the week, and I also plan on getting some pics and another video update posted as well..(I ran out of time tonight)
-
HillBillyF100
- Posts: 77
- Joined: July 16, 2010, 12:57 pm
- Location: Denton, Texas
Patching the Rust
Thought I'd show a small bit of progress on the rust repair on the cab..The pics are pretty self explanitory, but I cut the rusted panel out, made a patch panel to fix, then welded the patch in..I still have to grind the welds on the patch, and hammer/dolly into shape...
Here are some pics...
http://img831.imageshack.us/i/dsc0005s.jpg/
http://img824.imageshack.us/i/dsc0004p.jpg/
http://img820.imageshack.us/i/dsc0006ta.jpg/
http://img43.imageshack.us/i/dsc0009hg.jpg/
http://img199.imageshack.us/i/dsc0012bu.jpg/
http://img291.imageshack.us/i/dsc0008gj.jpg/
I'll post more when I can get to it!
Wish me luck...
Here are some pics...
http://img831.imageshack.us/i/dsc0005s.jpg/
http://img824.imageshack.us/i/dsc0004p.jpg/
http://img820.imageshack.us/i/dsc0006ta.jpg/
http://img43.imageshack.us/i/dsc0009hg.jpg/
http://img199.imageshack.us/i/dsc0012bu.jpg/
http://img291.imageshack.us/i/dsc0008gj.jpg/
I'll post more when I can get to it!
Wish me luck...
-
olliesshop

- Posts: 737
- Joined: May 16, 2010, 8:38 am
- Location: Grosse Pointe, Michigan (Detroit Metro)
- Contact:
Looking good !!! A lot more to go, but I bet it's a lot less welding than I have to do on my Uni.
Have fun.
Have fun.
Tim - 1961 F250 Uni
"Big Red" pictures ... http://olliesshop.smugmug.com/Trucks
Current build thread ... viewtopic.php?f=32&t=29505
"Big Red" pictures ... http://olliesshop.smugmug.com/Trucks
Current build thread ... viewtopic.php?f=32&t=29505
-
HillBillyF100
- Posts: 77
- Joined: July 16, 2010, 12:57 pm
- Location: Denton, Texas
Here is a video showing some more rust repair of the cab...(rough) I'll post pics later...
http://www.youtube.com/watch?v=ISlnrDy4Gb8
http://www.youtube.com/watch?v=ISlnrDy4Gb8


-
HillBillyF100
- Posts: 77
- Joined: July 16, 2010, 12:57 pm
- Location: Denton, Texas
Good to hear it might help others..that's why I'm doing it! Mu passenger side is similar to this side..I'll start on it soon...I worked on filling more smaller holes..My biggest lesson that I learned, is the tighter fit you can get on your patch pieces, the better..That, and try not to disrupt any original body lines/contours..the flatter the better!
-
HillBillyF100
- Posts: 77
- Joined: July 16, 2010, 12:57 pm
- Location: Denton, Texas
Hey, I just went and checked out your pics..nice truck there..olliesshop wrote:Looking good !!! A lot more to go, but I bet it's a lot less welding than I have to do on my Uni.
Have fun.
Ya, you might have a bit more welding in your future, BUT, don't get discouraged..I have seen worse than you've got..Those repairs will be easier with vendor supplied patch pieces...
Keep us posted!
-
HillBillyF100
- Posts: 77
- Joined: July 16, 2010, 12:57 pm
- Location: Denton, Texas
Bought manual tire changer to do tires!
Well, it's been a long while, and I wished I could say that 'Ol Blue is already on the road..But it isn't..I have started back working on it, and I'm full speed ahead!
I will post my progress to date, to catch everyone back up to speed!
I went to Tractor Supply to purchase a manual tire changer.. I'm wasn't terribly eager about dismounting the tires off one set of rims, and remounting onto ol blue's set, but...I'm even less keen on paying $20 bucks a wheel for a tires shop to do it! I used to work at a tire shop, I know what it takes...so...manual labor, here I come


I will post my progress to date, to catch everyone back up to speed!
I went to Tractor Supply to purchase a manual tire changer.. I'm wasn't terribly eager about dismounting the tires off one set of rims, and remounting onto ol blue's set, but...I'm even less keen on paying $20 bucks a wheel for a tires shop to do it! I used to work at a tire shop, I know what it takes...so...manual labor, here I come
-
HillBillyF100
- Posts: 77
- Joined: July 16, 2010, 12:57 pm
- Location: Denton, Texas
Tire Changer Woes
Ok...after starting to fight with the first old wheel/tire, I realized the flaw in this things design..Just like I had suspected, the foot pads aren't no where near long enough..This results in a very unstable base..So, I am having to remedy this..unfortunately, the last pic is how I had to leave the progress for the night..I went to my local metal yard to pic up some metal to build a more stable base..My hope is once I get this done, I can rip through these things!!
I'm also thinking of spraying under coating while I have the wheels and tires off...
More pics to come!


I'm also thinking of spraying under coating while I have the wheels and tires off...
More pics to come!
-
HillBillyF100
- Posts: 77
- Joined: July 16, 2010, 12:57 pm
- Location: Denton, Texas
Making a manual tire changer mount!
Well, after trying to use the tire changer without a good base, I have decided to build a base, using the receiver hitch of my F-350...My thinking is that if I move that truck, then the tire I am trying to change doesn't need to come off!! It is crude, but it should get the job done!


-
HillBillyF100
- Posts: 77
- Joined: July 16, 2010, 12:57 pm
- Location: Denton, Texas
Small update
Small update on 'Ol Blue...I picked up 2 front tires at a swap meet, so I'm switching gears and mounting them on my fronts, and mounting some other used tires that I had for the rear..I also sprayed some rubberized undercoating to the front inner fenders, frame, etc.. I will be bleeding the front brakes tomorrow, and starting on the rears!
On a side note..I noticed while at the store, a rustoleum "Metallic" in a spray paint..(11 oz. cans) I was curious if anyone has used these? I know spraying metallics in a spray gun is substantially more difficult, so I am a little concerned about the results I could expect..I have researched and I think I could do the whole job with 20 cans, putting the job at around $80, give or take...I like the idea, because I am a fan of metallic paints, AND they have a great blue color that I want, and the silver color...(I plan on painting the roof of my cab Silver...
Thoughts?
I'll try to post pics of the undercoating soon..
On a side note..I noticed while at the store, a rustoleum "Metallic" in a spray paint..(11 oz. cans) I was curious if anyone has used these? I know spraying metallics in a spray gun is substantially more difficult, so I am a little concerned about the results I could expect..I have researched and I think I could do the whole job with 20 cans, putting the job at around $80, give or take...I like the idea, because I am a fan of metallic paints, AND they have a great blue color that I want, and the silver color...(I plan on painting the roof of my cab Silver...
Thoughts?
I'll try to post pics of the undercoating soon..